If you’re looking to change up the way users learn, why not create an elearning game? Engage your learners with a bit of old fashioned fun while they learn about your chosen topic. If you’re out of inspiration, or not sure where to start, let’s take a look at our very own Escape the Room game. We created this game using Claro in the dominKnow | ONE platform. If you haven’t seen our sample yet, take a look at it here:
Creating the Escape Room Sample

Product: dominKnow | ONE | Version: 7.4
Applies to: Claro | Edition: Solo, Team, Business, Enterprise
Applies to: Claro | Edition: Solo, Team, Business, Enterprise
Creating the Escape Room Sample
Learn how the Escape Room was created using Claro in dominKnow | ONE.
Getting Started
Where do you even start when you want to create a game? The first step is brainstorm. If you’re going to be creating a similar break out experience, you should brainstorm the following:
- What type of room?
- What does the room look like?
- What elements are going to be in the room?
- Will there be more than one room?
- Where are the elements going to be placed?
- What elements are clues?
- What elements are distractors?
- What happens when you click on specific elements? Will they show another element, or will they lead to a mini game?
- What type of mini games/questions do you want to add?
- Will the user be able to interact with the game by moving around in the room? How many times can the user move within the room?
- What will the course/page structure look like?
- Will there be sound effects? If so, what elements have a sound effect?
In the Escape Room sample, the room was sketched out on paper then created using Photoshop. Once the layout was created in Photoshop, each element was saved as individual PNG files and uploaded as assets to the Project. When creating the design, you should also take note of the different states each element can have. For example, the door has two states, closed and open. So we needed two illustrations and two PNG files. The door handle is its own individual asset because it moves when the user clicks on it.
Before you start, you should have an idea of what happens when you click on certain elements, what happens if you get a mini game wrong or right, and the pages you will need to make the game work.
In our game, we have multiple versions of the main room page because different things change after trying, for example, a mini game.
Each different instance of the room page will have to have its own variable for the slider. Variables are stored at a Project level, so we needed to make sure that the settings from the Slider on one version of the room Page didn’t over ride what the learner does on a different version of the room page.
We used Page Link actions to jump to and from the different pages in the Project.
The full room – using an oversized image and panning using the Sliders
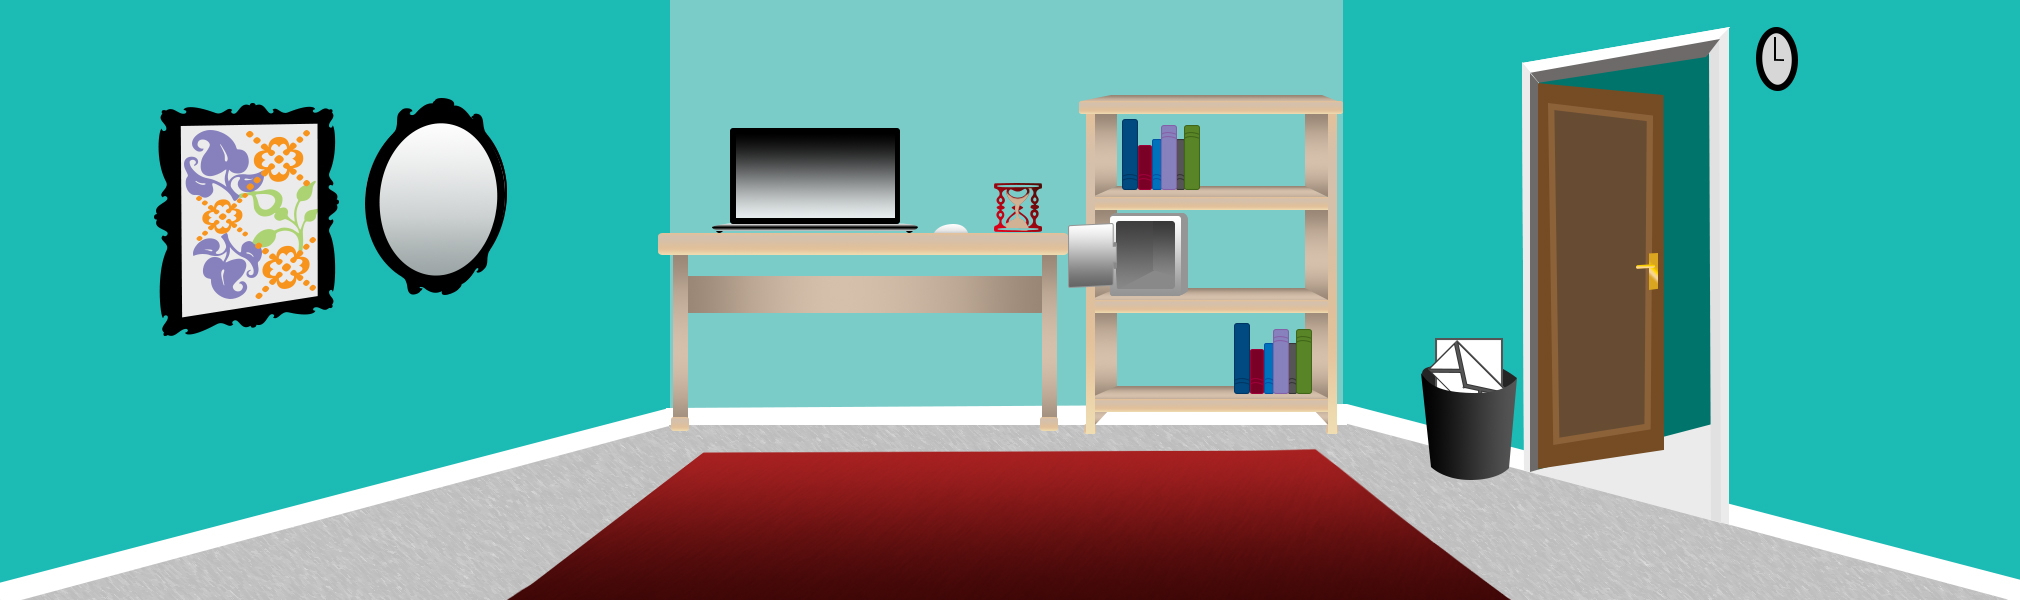
For the main room pages, we have an image that is twice as wide as the standard Claro page dimensions. You can think of the page dimensions as a frame and the whole larger scene moves back and forth behind that frame as you use the slider.
Take a look at this lesson to see how you add in the oversized background.
Once the background is added, you can then add all other elements on the page – NOTE elements will be placed off the page, so that the moving effect works.
Take a look at these screenshots:
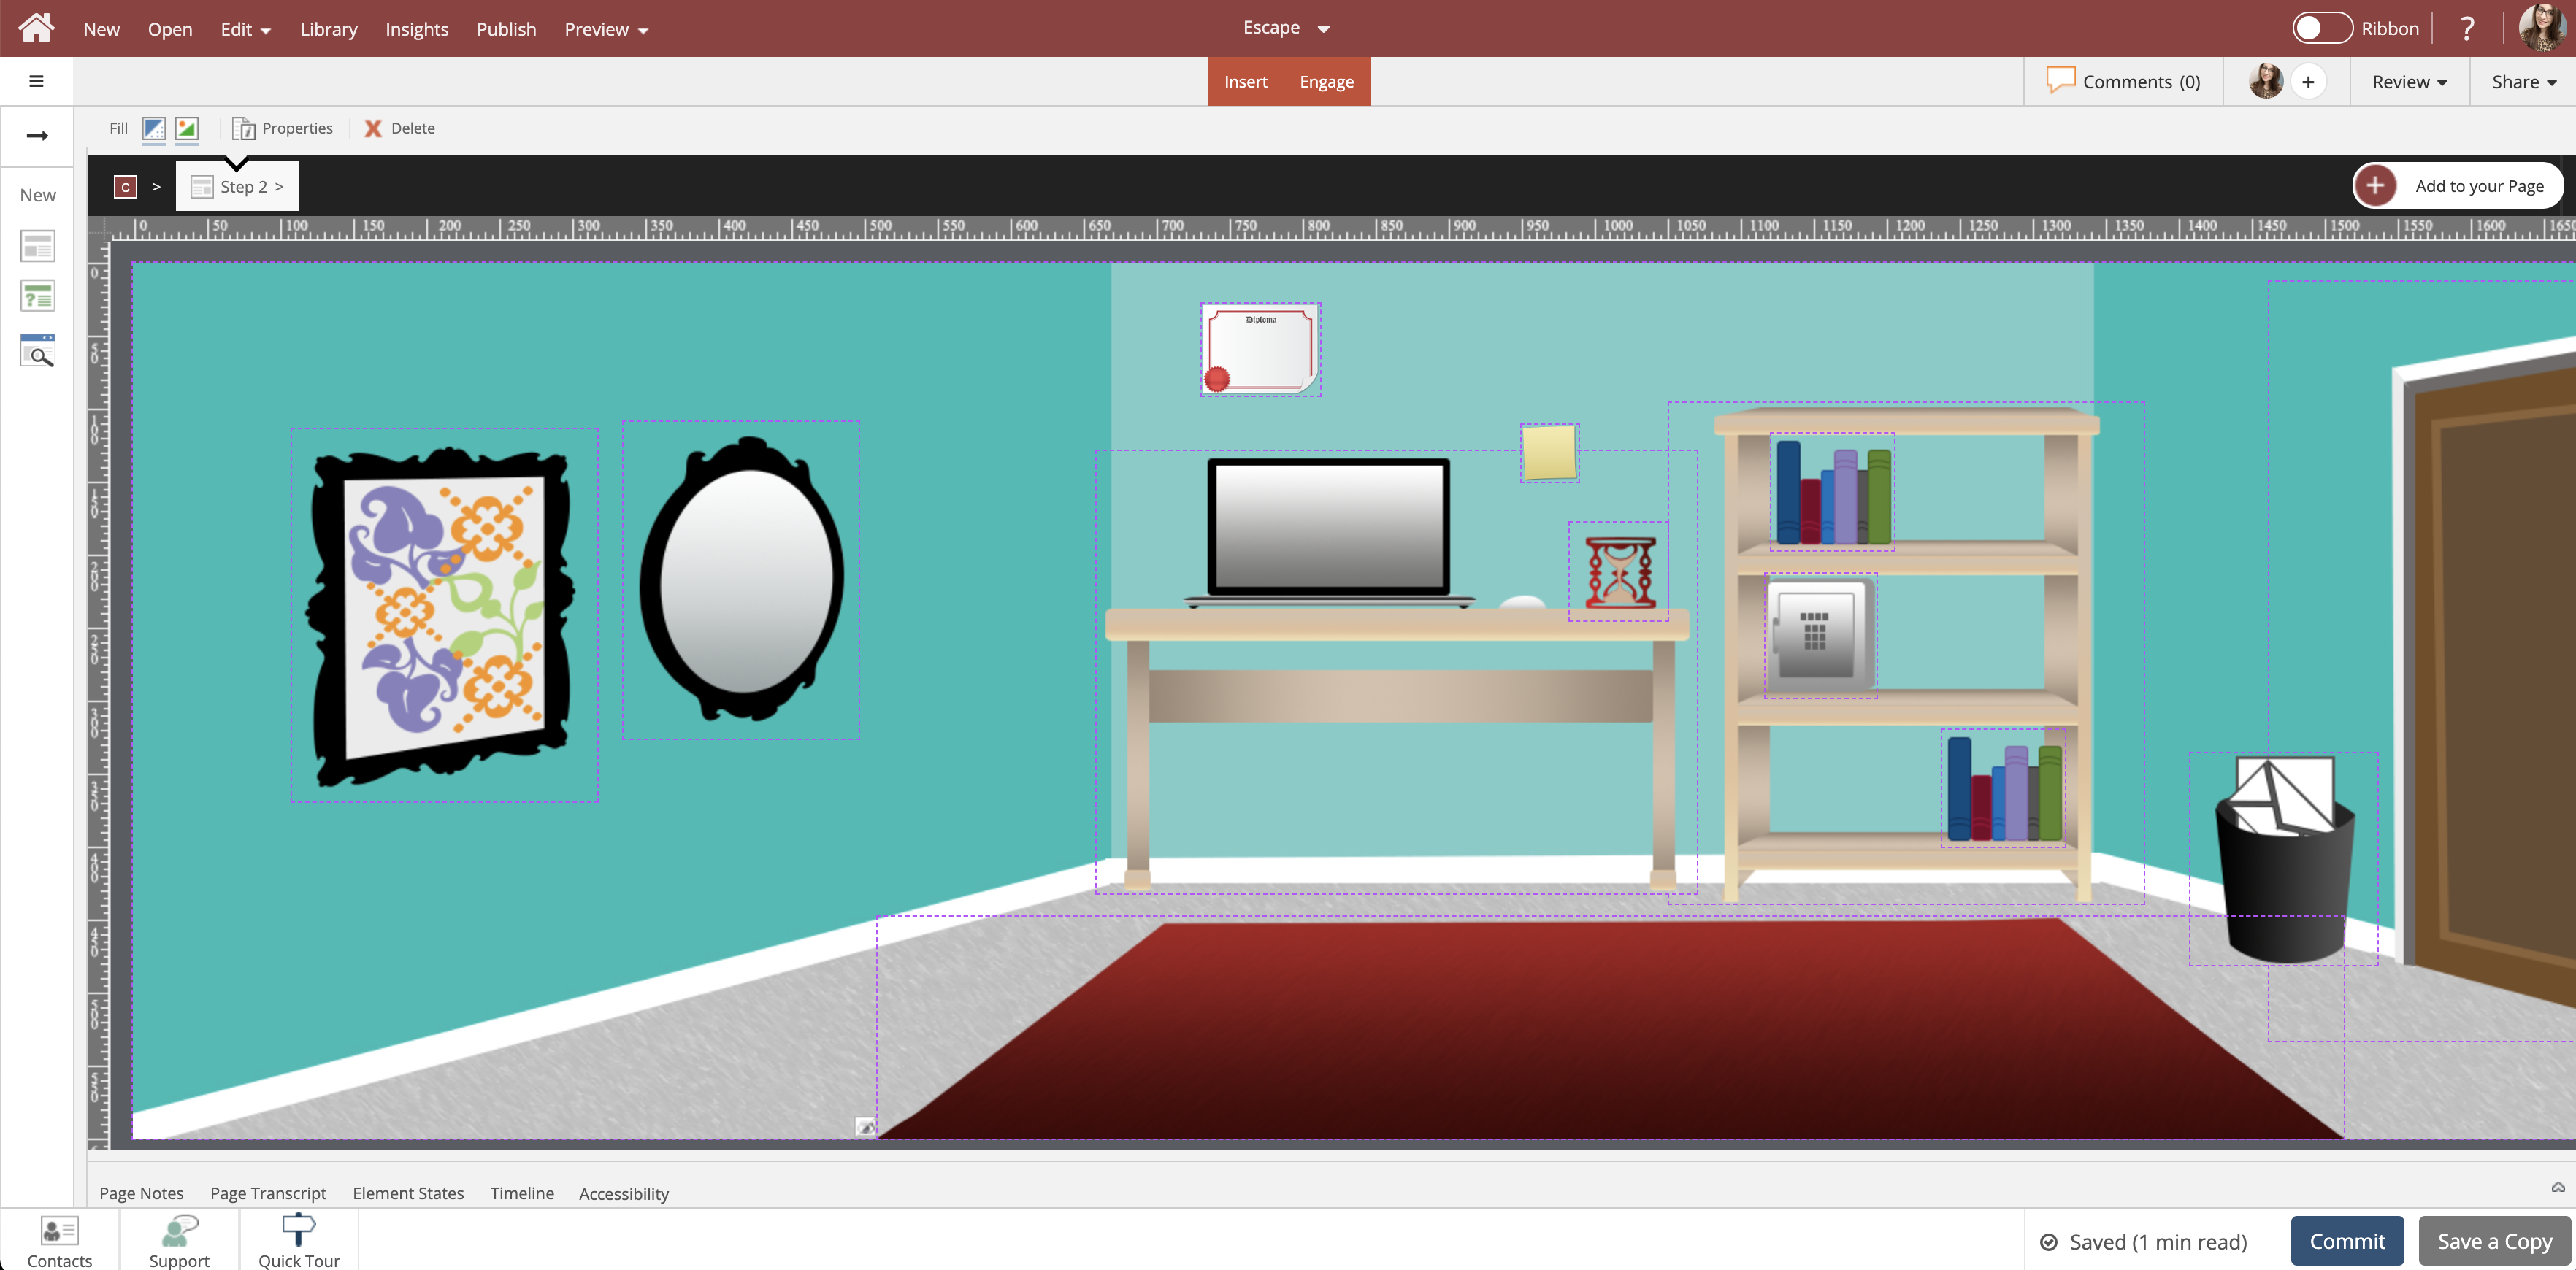
When you use the slider, the large background image and all the elements are animated to move from one position to another. So, once all elements are placed you have to gather coordinates for EVERY SINGLE ELEMENT on and off the page for each position. Take a look at this lesson to see how you can gather the coordinates needed for each position:
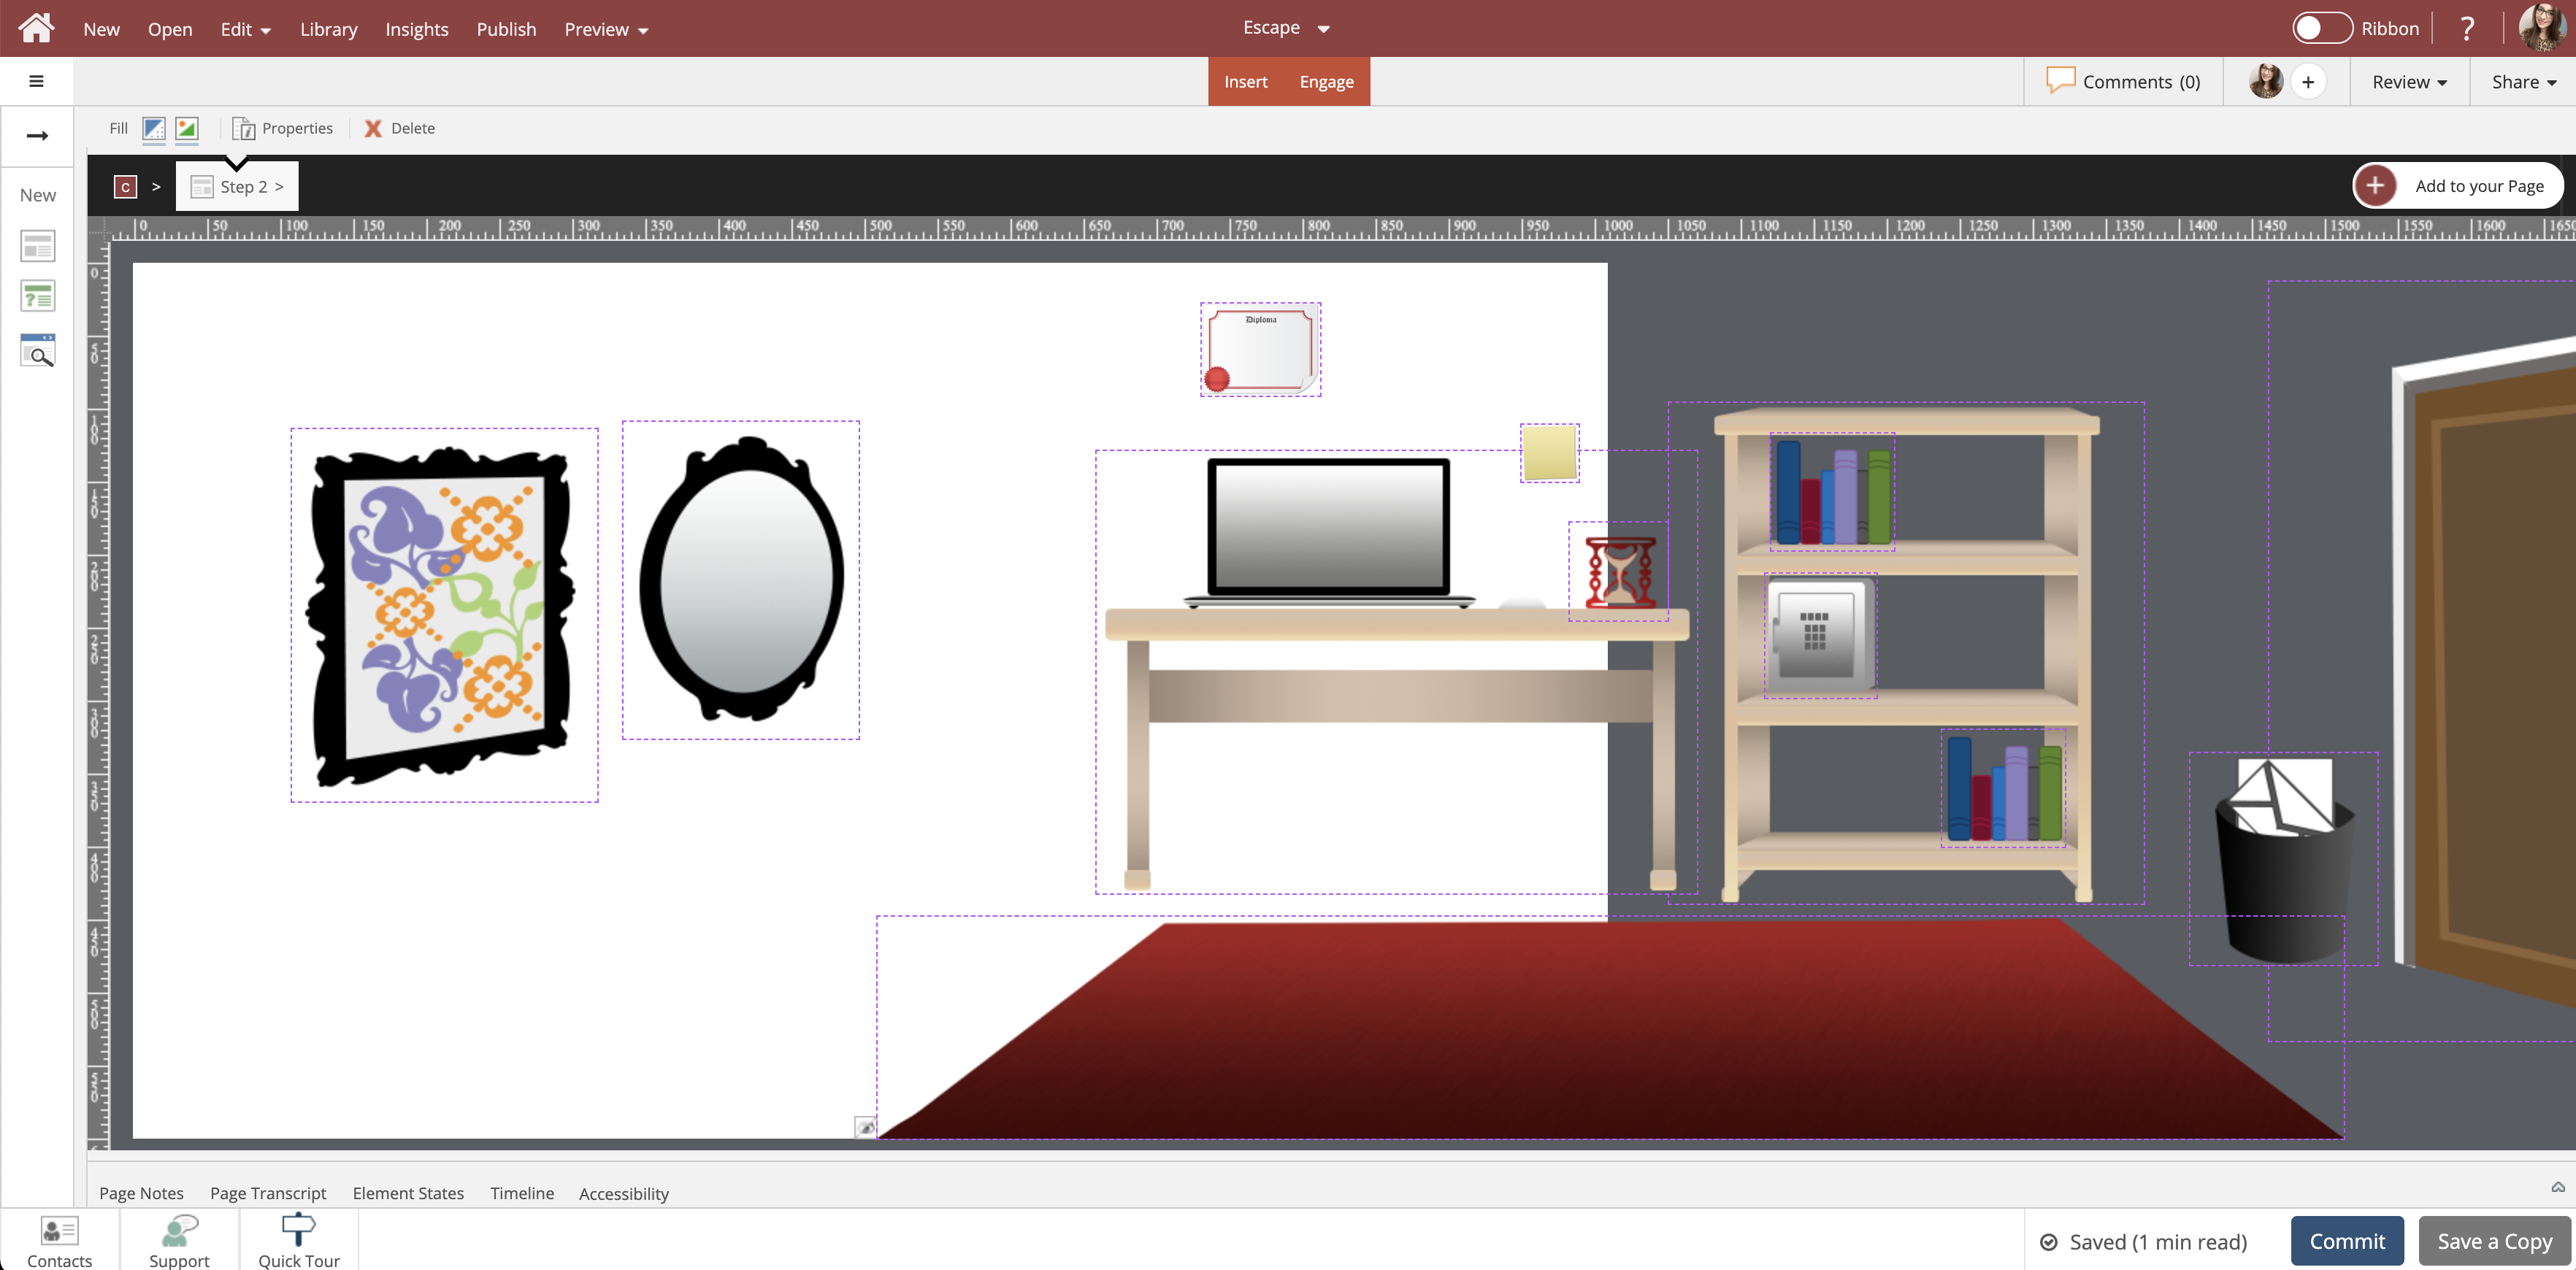
The easiest way to do this is start all elements in Position 1 and gather the coordinates (like in the lesson above). When you have all the coordinates written down, select all elements in the layer (hold down the Shift key while selecting them) and move them to position 2. Make sure to keep the Y coordinates the same so the elements don’t pan and move up or down at the same time. Gather position 2 coordinates for all elements. Select all elements in the layer and move them to the position 3. Gather position 3 coordinates. Once all coordinates are written down, undo the steps so that the elements go back into positon 1 starting position.
Next, take a look at the following lesson and learn how to add the slider and give it a variable so that you will be able to move the elements using the slider. The slider sets the variable, then we evaluate the variable to trigger the animation that moves the elements to the new position.
Now that the slider and elements are added, you can start to add the animation effect to each element. Follow the steps in this Lesson for each element on the page in each position:
Other tips
You can add show and hide actions to elements and get elements to open, or show something on the screen. (For example, clicking a book on the book shelf will open the book on the page).
Once you have the first room page set up, you can duplicate the page to create multiple instances of the room.
*Note each room instance will have its own slider, and the slider variable will need to be changed on every page. When duplicating a room, you will have to change the slider variable, go into each action and change the slider variable that needs to be called.
The Jigsaw Puzzle
To create the Jigsaw Puzzle mini game, take a look at this lesson:
Allowing the Learner to type in their name
In the Escape Room we ask the user to input their first and last name, so we can use their name within the game to make it a more personalized experience. Take a look at this lesson to learn how to add an input area, and give it a varaiable name.
Displaying a variable value in a text element
Once the input area is added, you can call the variable in a text element within the game. In the Escape Room we called the learners name on the certificate, and on the computer. Take a look at this lesson to learn just how to do this.
Now that you know the tricks we used to create the Escape Room, create your very own game to teach your learners content in a fun and interactive way.


Comments ( 0 )
Sign in to join the discussion.