Quickly and easily record a software lesson using Capture

Whether you want to create a software simulation or a GIF, the process for capturing the steps is the same.

This lesson covers the process from the context of a software simulation added to a Claro page.

The same steps apply to Flow, where the Capture Placeholder will be added as a new section on the page. 

To capture the steps for a software simulation, select Add to Your Page:


The Add to Your Page panel will open.

On the All Elements tab, scroll down to the Record section and select New Simulation: 


A placeholder for the Capture element is added to your Claro page. (In Flow, it will be added as a new Section.)

Select Open Capture to create a New Project


The authoring site will check to see if you have the Capture application downloaded. Your browser may also ask you to confirm this process.


If this is your first time using Capture, you will be walked through the process to download and install the required app.

If you already have the Capture application downloaded, it will check for updates.

OpenH264 Video Codec

For authors using Windows, we strongly recommend downloading the OpenH264 Video Codec provided by Cisco Systems, Inc. to improve the Capture process.

This codec is not required for creating a Capture lesson, but it does improve the quality of the Capture lessons that you can make. Using the OpenH264 codec allows the tool to capture a greater range of screen choices when you create your initial recording in Windows.

And for both Windows and Mac users, the codec is required in order to publish your lesson as an MP4 file.

Once the application is open, you’ll see the Start Panel:


Since you selected New Simulation back on Add to Your Page panel, the Start panel has that option highlighted in light blue. You could choose to switch to one of the other options, if you needed.

Below that are three options for recording:

  • Select Window – This allows you to select a specific window on your desktop
  • Full Screen – This allows you to record your full screen. If you have more than one monitor, Full Screen will capture only your main monitor.
  • Custom – This allows you to set a dimension.

The shortcut keys are helpful to know and use during the recording of your Capture lesson. Respectively, they:

  • Add an extra screen capture step to your recording
  • Pause the recording
  • Stop the recording

On the right side is a list of Recent Projects. This is a list of the recent projects saved to your computer, and you could choose to open and edit one of those files. (NOTE: Once you finish working on a Capture lesson it is imported into your dominKnow | ONE site, including the Capture source file. So it is usually better to edit the file stored in dominKnow | ONE rather than the local file from your computer, in case other edits were made.)

Full Screen

Selecting Full Screen will close the Start panel and will show a prompt box on the screen that will be captured:


You can begin capturing at any time by clicking on the screen. The dialog box will go away and the next action you take on the page will be the first step recorded. If you have audio you’ll hear a camera sound effect each time a step is captured.

(This recording mode does not show a bounding box around the screen.)

Select Window

Selecting Select Window will close the Start panel. You can now roll over windows on your desktop and see them boxed in red. To select a window for your recording, click on it. When you select a window, you'll see the red boxing around it.

You'll next see this prompt box:


You can begin capturing at any time by clicking on the window once more to start. The dialog box will go away and the next action you take on the page will be the first step recorded. If you have audio you’ll hear a camera sound effect each time a step is captured.

Custom

Selecting Custom will close the Start panel and show a red bounding box on your screen:


You can drag the bounding box anywhere on your screen(s).

You can resize it by dragging on the corners or by using the W: and H: input fields on the panel at the top.

When you have positioned and resized the bounding box to match what you need, click OK.

The bounding box will continue to be shown, and you'll now see this prompt box:  


You can begin capturing at any time by clicking anywhere within the bounding box to start. The prompt box will go away and the next action you take on the page will be the first step recorded. If you have audio you’ll hear a camera sound effect each time a step is captured.

Tip: Capture is not creating a video, only saving separate screen images for each step. This means there's no need to rush or worry about timing or how accurate your mouse movements are.

Finishing the capture process

After the last step, click the Stop button (for Mac it's on the top of your screen, for Windows it's in the System task bar at the bottom of your screen) or use the keyboard shortcut (for Mac, Command + Return, for Windows Ctrl + Enter).

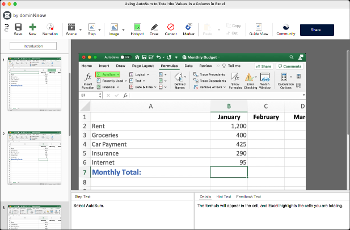
The recording will open in the editing panel and you can now edit the lesson:


  0     0

Similar Projects

Questions  ( 0 )