Tools and features to help as you author your Project

The panel to the left of the Stage has three sub-sections, each available as a tab:

  • Project tab
  • Page tab
  • Actions tab

It's easy to not notice these tabs when you're first working in dominKnow | ONE but as you spend more time authoring you'll really come to appreciate all the options available on these tabs. 

The Project Tab

The Project tab is different between Claro and Flow Projects: 


In both Claro and Flow:

  • Outline shows the structure or content outline.
  • Deleted shows a list of all Pages that have been deleted from the Project. You can undelete them from this list! 

Flow projects also have Masters and Targets.

On the Masters option you can create custom page headers and footers as well as course and module end screens and a course certificate.

On the Targets option you can create pages that can be shown in a modal window over the main page using the Show Page In Lightbox action.


The Project tab also has a three-dot menu (sometimes called a "ke-bab" menu):


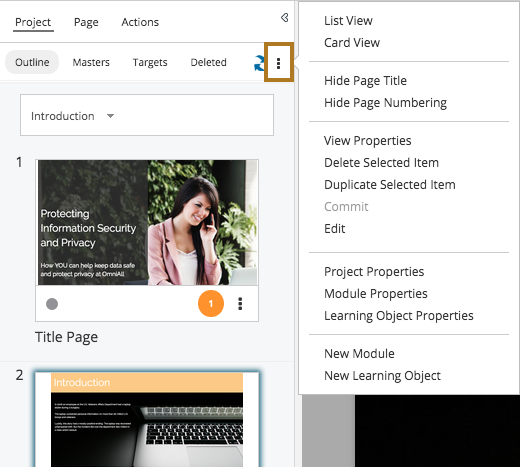
The options are different depending on which View you are currently in.

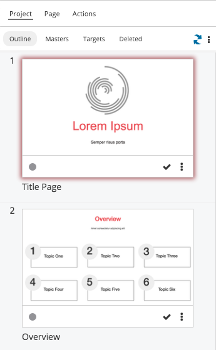
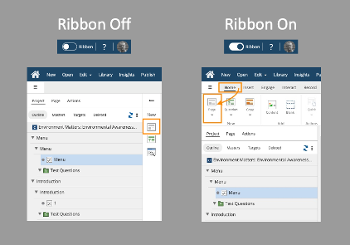
List View and Card View let you switch the Outline between the two respective views.  

Hide/Show Page Title turns on the display of the page titles in the Card outline (it will say Hide or Show depending on its current setting). It's only available in Card View because page titles are always shown in List View.

Hide/Show Page Numbering turns on Page numbering in the Outline (it will say Hide or Show depending on its current setting).

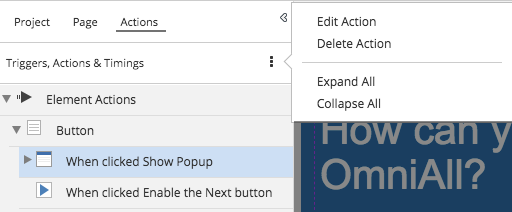
View Properties opens the right-side Properties panel for the item you have selected on the Outline:

  • In Card view this would be a page or question.
  • In List View, this could be a Page, Question, a Learning Object, or a Module.

Delete and Duplicate will also perform their respective actions on the item you have selected on the Outline. (Remember: Deleted pages are moved to the Deleted list, as noted above.)

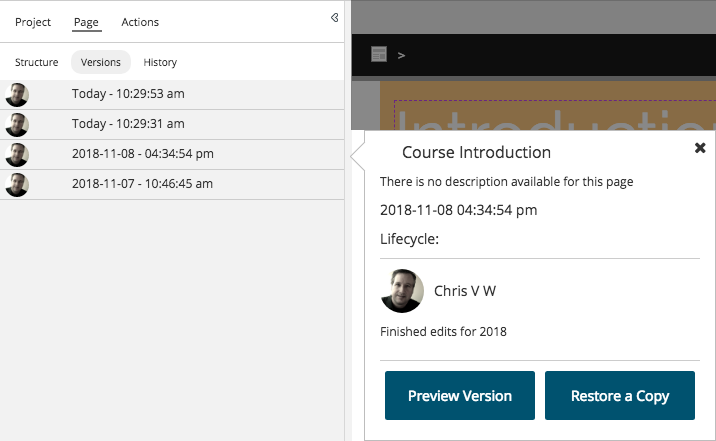
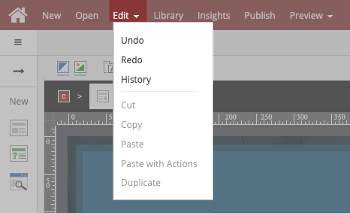
Commit and Edit relate to the Commit/Edit process, which is outlined in this article.

The three Properties options open their respective properties panels on the right side of the Stage.

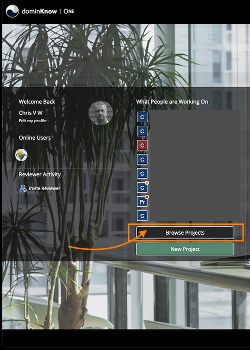
You can also add a New Module or New Learning Object to your structure.

In List View, the three-dot menu also has options to Expand All or Collapse All items in the List View tree menu.

The Page Tab

The Page tab has three options available - but the first option is different for Claro and Flow.

Claro Page Tab - Layers

Here's what the Page tab looks like in Claro: 


The Layers option displays the Base Layer of the Claro page by default. 

Like PowerPoint (and many traditional elearning tools), Claro pages have a "stacking order". When you add an element to a Page it's added above any previously-added elements. In the image above, the Image file was added first then the Title Text then the Subtitle Text. You can change the stacking order just by drag and drop within the Layers list.

You can add more Layers than just the Base Layer by using the three-dot menu. These Layers let you collect elements together to target them for actions. For example, your page might have a button to show a new background panel along with an image and some text. Those three elements can all be added in a new Layer and you can use a Show action to target the Layer rather than show the three elements separately.

NOTE: When you are working in a specific Layer, the other Layers on the page are unavailable on the Stage.

The eyeball icon lets you show or hide an element on the authoring stage while you work - use it to edit an element at the bottom of the stacking order without having to move the elements above it. It doesn't affect the page in Previews or when published. 

You can also use the Lock icons to lock elements in their location on the page so they can't be moved unless unlocked. (You can still edit the element when it's locked, for example, change the text in a text element.)       

The Layers option also has a three-dot menu available: 


Edit Selection and Delete Selection let you delete the selected element.

Create A New Layer lets you - surprise! - create a new Layer above the Base Layer. Once the new layer is created, you can add elements to it. 

Duplicate Layer lets you duplicate the Layer currently being displayed.

You can select elements on the display then use Move Elements to a New Layer to create a new layer that contains the selected elements. 

Lock All Elements In Layer and Hide All Elements In Layer are one-click options to lock/unlock or hide/show all elements in the currently-shown Layer.

Merge All Layers Into Base lets you delete all the Layers above the Base Layer, but preserve the elements by adding them to the Base Layer. 

Flow Page Tab - Structure

Here's the Page tab in Flow:


The Structure shows the Sections, Rows, Groups and Elements on the page from the top of the page down to the bottom. It's like an overview of the information you would see in the breadcrumb above the page as you select elements on the Stage.

The options here are simpler than the Claro Layers.

Selecting an item on the Structure highlights it on the Stage. You can use the triangle icons to collapse/show items in the various containers to simplify the information display on the Structure. 

If you rename an element or Group in the bread crumb, the name change will be reflected in the Structure.

Claro and Flow Page tab - Versions

For both Claro and Flow, the Page tab has a Versions option:


The Versions options shows a list of all Versions of a Page created when you used the Commit feature on that Page. 

To restore a page Version back to your project, select it on the list then use the Restore a Copy option. This adds a copy of the Version back to your Project. The Version will remain in the Versions list.

To learn more about Commit and Versioning, check out this article.

Claro and Flow Page tab - History

For both Claro and Flow, the Page tab has a History option:


The History option shows a list of the changes made to the page that can be undone.

The items are listed in reverse-chronological order with the most-recent change at the top.

Selecting an item on this list will revert your page back to that state.

If you select a previous state then make another change on the page, the history will be removed for the changes made after the state you selected.

For example, if the History list shows 10 changes and you select the seventh change on the list, the page will revert to that state. The six states above this one are all still available to go to until you make a change on the page. When you do that, the first six changes will be removed and the new change will be added above the state you selected (and that state will now be second on the list instead of seventh).

The History is connected to the Undo and Redo buttons in the upper left corner of the interface. Selecting Undo moves you backwards through the states on the History tab. Selecting Redo moves you forward again through the available states.

NOTE: The History does not track creating or deleting containers on the page, such as adding or deleting an element. These cannot be undone.

To learn more about History, Undo and Redo, check out this article.

The Actions Tab

The Actions tab lists any actions set on the page:


When you select an Action you can use the three-dot menu (as shown above) to Edit or Delete the selected Action. 

Editing the Action opens the edit panel on the right side of the Stage.

You can also use the Expand All and Collapse All options to open or close the displayed items on the Actions list.  

  0     0

Similar Projects

Questions  ( 0 )