There's a wide range of things to know relating to audio files.
Working with Audio Files

Product: dominKnow | ONE | Version: 7.4
Applies to: Flow, Claro
Applies to: Flow, Claro
Settings available on the Options tab for audio files, timing events to a narration file plus the ability to set actions based on the audio file completion
Options Tab for Audio Files
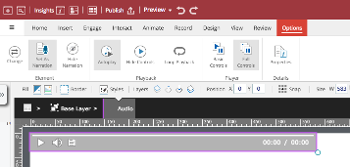
When you have added an uploaded audio on a page, selecting it adds the Options tab. The Option tab has a range of settings for controlling the audio file behavior.
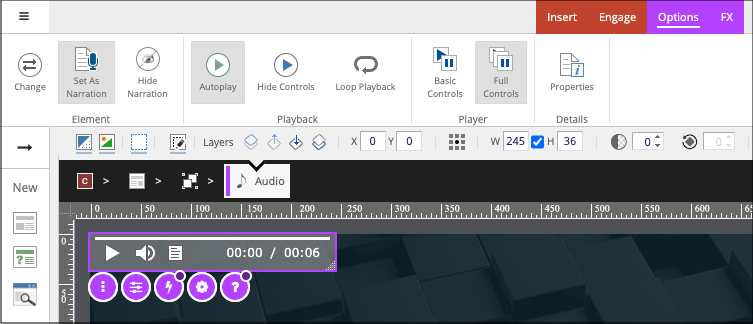
The Element section of the Format context tab has three options:
- Change: Allows you to change the audio file for a different audio file. If you have actions or triggers timed to the audio file, these will remain in place, including settings made using the Timeline below the Stage.
- Set as Narration: Selecting this option tells the Page Timeline to synchronize to the audio file. It also links the audio file to the Audio control button available on the course player (navigation) bar, if the Theme you are using has this feature. When the learner selects the audio button on the course player, the audio file will be muted. This option also sets the audio file to play to completion, in case on-screen events are synchronized to it so they will not be interrupted. You can only set one audio file per page as Narration. Using the Add Narration option adds the audio file to your page and automatically sets it as the Narration file.
- Hide Narration: This option hides the narration audio file on the page altogether so it does not occupy any space on the page.
The Playback section of the Format context tab has three options:
- Autoplay: This has two possible behaviors, depending on whether you also select the Set as Narration option.
- Autoplay without also setting the file as Narration: This sets the audio file to automatically play when the element is loaded on the page in Claro or comes into view in the browser in Flow. It will also automatically pause playing when it is no longer in view on the stage (for instance, in Flow if a learner scrolls down further on a long page).
- Autoplay plus setting the file as Narration: This sets the file to autoplay when the page loads and sets it to continue to play whether or not it is within view in the browser.
- Hide Controls: Hides the audio player controls on the page. The Audio Element is still on the page, and does take up some space.
- Loop Playback: Sets the audio file to loop continuously.
NOTE: If the file is played by an action from the learner, either using the Audio Player controls or by a button wired with a Play Audio action, the audio file will continue to play whether it is within view in the browser or not.
The Player section of the Format context tab has two options:
- Basic Controls: This presents the learner with a speaker-icon control to play and pause the audio file. This is the default Player setting when you insert an audio file.
- Full Controls: This presents the learner with a full-control player with play, pause, time, scrubbing and transcript options.
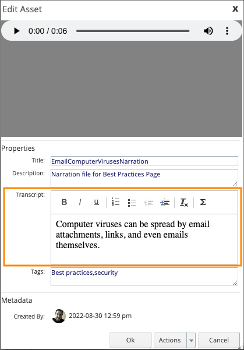
The Properties button allows you to view the Properties information for the audio file, where you can edit the Description and keyword Tags, and the Transcript.
Synchronizing on-page events to an Audio Narration file
When you set an audio file to be the narration file on the page, the Timeline feature below the Stage is automatically set to synchronize to the Narration file.
(If no audio file is set as Narration, the Timeline will be synchronized to the page loading.)
You can use the Timeline to quickly adjust when an element should appear, based on the narration file's time.
Setting actions based on audio file completion
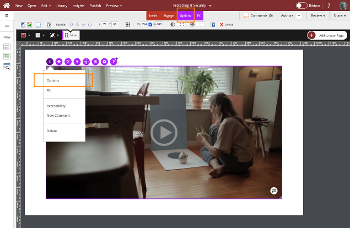
When you select an audio file on the Stage you can see the Actions (lightning bolt) icon:
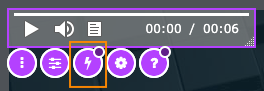
When you select it you'll see a list of actions that can be triggered when the audio file ends:
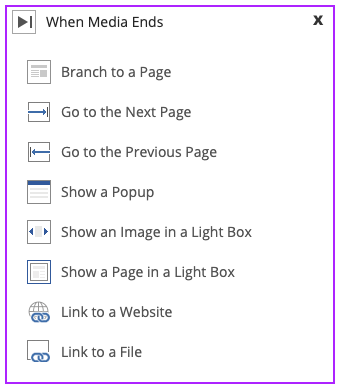
You can select any of these options to set up the respective action.
If an action is set, you'll see a small bubble added to the Actions (lightning bolt) icon.
To view the actions, click the Actions (lightning bolt) icon. You'll see the Current Actions panel:
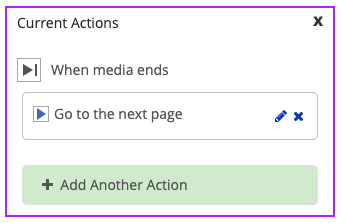
You can select the Pencil icon to edit the settings for the action, or the X to delete it.
And you can use the Add Another Action button to set additional actions on the audio file.


Comments ( 0 )
Sign in to join the discussion.