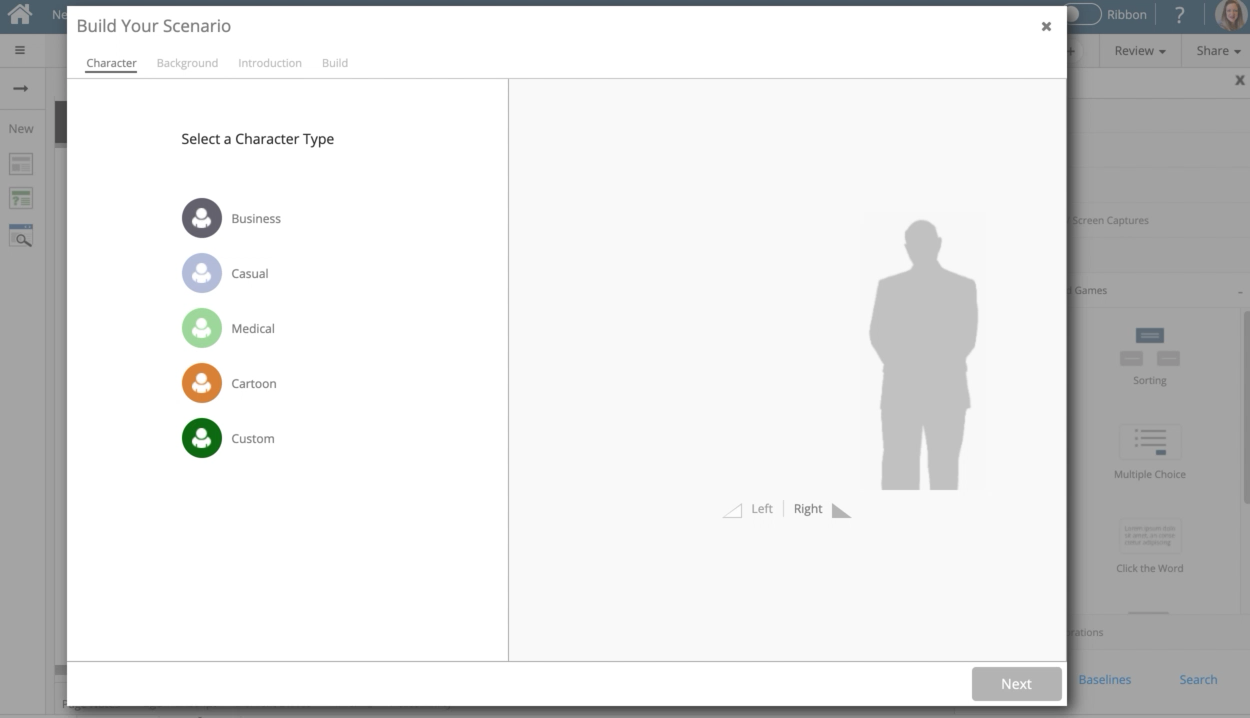
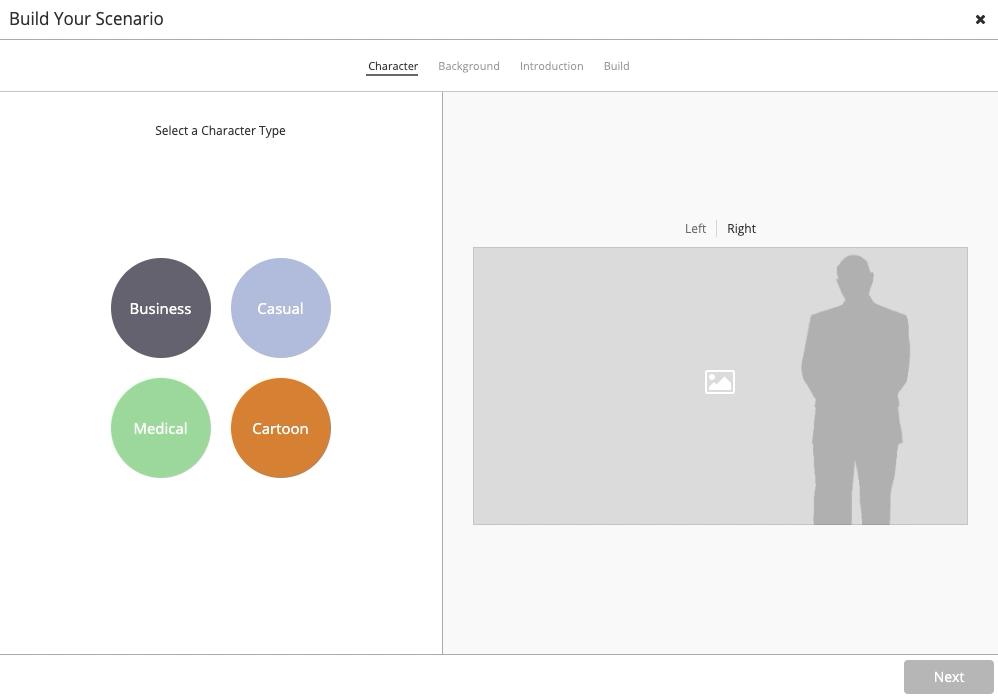
When the Scenario Builder first opens, it asks you to pick a character type to get started. You can also choose if you want the character on the Left or right side of the scenario frame.
Let’s pick Casual.
Click the continue button:
2
You now see the list of available characters in the Casual category. You can switch to a different category by selecting one of the other tabs.
For this example, select the character in the upper right corner.
Click the continue button:
3
You now see the character added to the display panel on the right side. You can also see preview images for the five Character Moods on the left side.
Select Next.
Click the continue button:
4
You now see the available backgrounds.
For this example, select the highlighted background.
Click the continue button:
5
The background is added to the display on the right side.
On the left side, you can control several settings for the display.
You can choose to have the background blurred or not. You can also choose the display options for the Character Text and User Text elements, including element shape and color.
For this example, choose the Oval option for the User Text elements.
Click the continue button:
6
The User Text elements are now set to Oval on the right-side display.
Select Next.
Click the continue button:
7
The Introduction text is shown over the scenario before the learner starts it. It's a chance to set the scene and provide any instructions the learner should follow.
Click in the text entry area and we'll add Introduction text for you.
Click the continue button:
8
Select Next.
Click the continue button:
9
The Build tab shows the Dialogue Tree on the left, which will change as you add more scenes to your scenario. It also shows the input fields for the character's opening statement and the option elements for the current scene.
Select the text entry area for the character's statement and we'll add text for this example.
Click the continue button:
10
Select the text entry area for the first Option and we'll add text for this example.
Click the continue button:
11
Select New Scene. This adds a new set of options below this Option in the Dialogue Tree on the left side.
Click the continue button:
12
Select the text entry area for the second Option and we'll add text for this example.
Click the continue button:
13
Select New Scene. This adds a new set of options below this Option in the Dialogue Tree on the left side.
Click the continue button:
14
Let's set up the second scene, which is where the character replies to Option 1 (if the learner selects that option).
Select the Scene on the Dialogue Tree.
Click the continue button:
15
The right side panel now shows the text of the selected option at the top.
Select the text entry area for the character's statement and we'll add text for this example.
Click the continue button:
16
Select the Mood icon to set a different Mood for the character in this scene.
Click the continue button:
17
Select Thinking from the list.
Click the continue button:
18
The character's image is changed.
Select the text entry area for the first Option and we'll add text for this example.
Click the continue button:
19
Select New Scene.
Click the continue button:
20
For this example, we've just scrolled down on the right side panel to better show the second Option and the Add a Choice button.
Select the text entry area for the second option we'll add text for this example.
Click the continue button:
21
Select New Scene.
Click the continue button:
22
For this scene, we'll have three options for the learner to choose from.
Select Add a Choice.
Click the continue button:
23
Select the text entry area for the new third option and we'll add text for this example.
Click the continue button:
24
This option will be be an ending for this branch.
Select End.
Click the continue button:
25
Instead of a square, the option is shown as a circle on the Dialogue Tree.
Select the option on the dialogue tree to access the settings for this End.
Click the continue button:
26
Select the text entry area for the character's statement and we'll add text for this example.
Click the continue button:
27
Select the Mood icon to set a different Mood for the character in this scene.
Click the continue button:
28
Select Angry from the list.
Click the continue button:
29
For this example, we've just scrolled down on the right side panel.
The character's image is changed.
Select -2 as the Score value for this Ending.
Click the continue button:
30
Select the text entry area for the Feedback text and we'll add text for this example.
Click the continue button:
31
Let's have this ending take the learner back to the previous scene so they can make a different choice.
Select Go to Node.
Click the continue button:
32
Select the Scene on the Dialogue Tree.
Click the continue button:
33
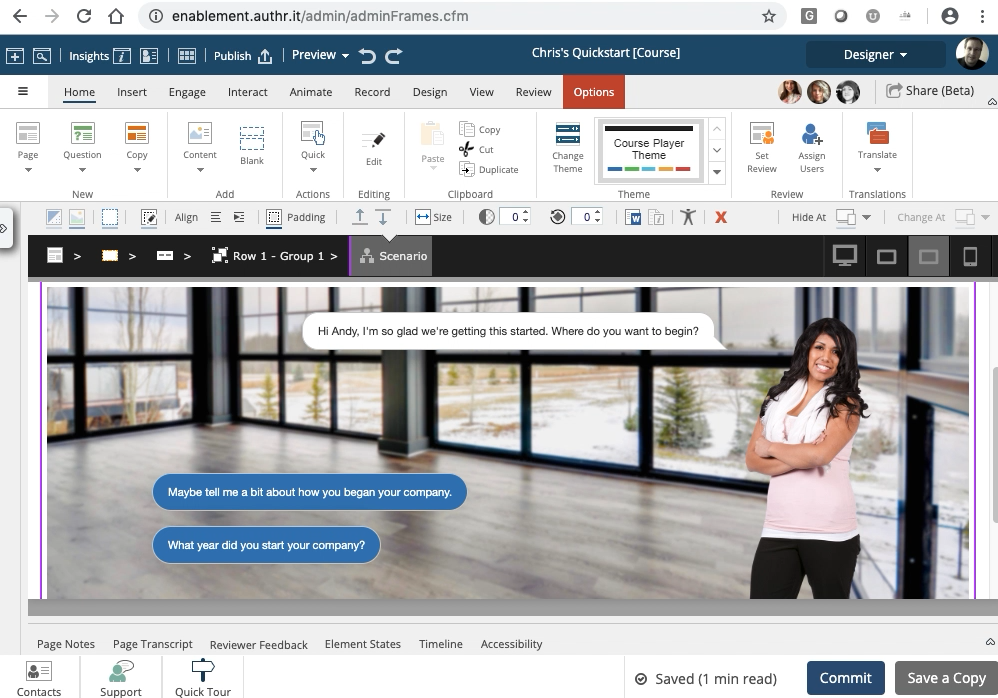
A green line now connects the ending with the scene on the Dialogue Tree. If the dialogue tree becomes too busy you can deselect the Show Links toggle in the upper left corner.
Select Done and the scenario will be saved to your page.
Click the continue button:
34
You can return to edit the Scenario just by double clicking it on your page.
Hi, I'm using the scenario builder and have a few questions. 1. Is it possible to add images into each speach bubble? I can see the option for audio, but not for an image. 2. Is it possible to format the text, i.e. if I want to bold or italicising something? 3. Is it possible to add in links to pop ups or hyper links into the speach bubbles? 4. Is there any way I can use the images in the scenario as their own stand alone images? I can't seem to find a full body avatar in the stock media...
During this episode of IDIODC the gang chats about the basics of what xAPI is, how it works and a few different tips and tricks to get xAPI-first-timers started.


Comments ( 0 )
Sign in to join the discussion.