In the Capture application editor, the Share button has options to publish as a document:
Additional ways to help your learning audience master software tasks
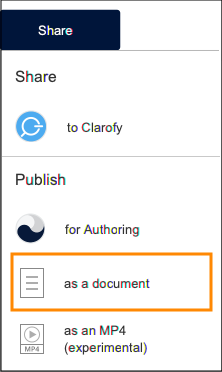
Publish as a Document
The Publish as a Document creates a Word file for the lesson and saves it to your local computer.
The Word document will include Step Text, Detail Text and the screen image for each step.
The Word document will also include Introduction and Summary text, if you've added that to the lesson.
The screen captures will show the red hotspot box for the step as well as any drawn items (arrows, boxes etc.) and any censored areas you have added while editing the Capture lesson.
They will also show any markers that have been added as icons on the screen, but the associated text will not be included in the document.
If you have set Guide View cropping on any steps, the document will use that cropped image area.
The Document version can also be included as a downloadable asset for the learner when you publish the Capture lesson and add it to your dominKnow | ONE page.
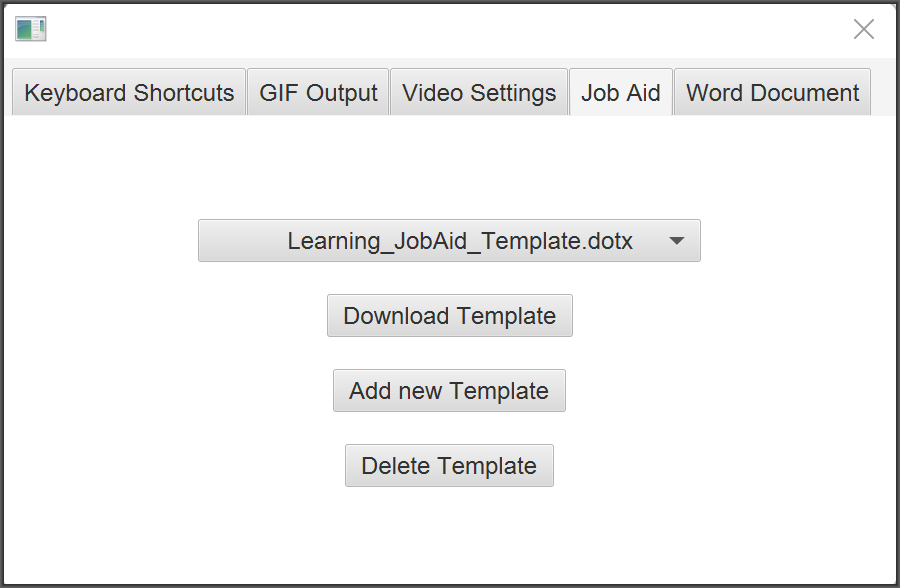
In the Capture settings is a tab for the Word document:
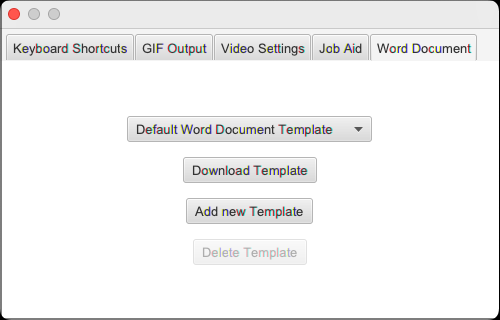
If you have more than the default Job Aid Template available, you can select a template using the drop-down menu. This choice will be set until you return to this panel to change the template choice.
The Download Template button allows you to download the default template so you can edit it in Word.
The Add new Template button allows you to add a template after editing it.
The Delete template button allows you to remove a template (you can not remove the Default.)
To access these settings on Windows, go to File > Preferences.
To access these on a Mac, go to Capture > Preferences.
PDF Job Aid
When you publish the Capture lesson for use in a dominKnow | ONE page, there are options to include a Job Aid download as well as a Document download. If these settings are select, the learner will see download buttons as part of the lesson navigation on the page.
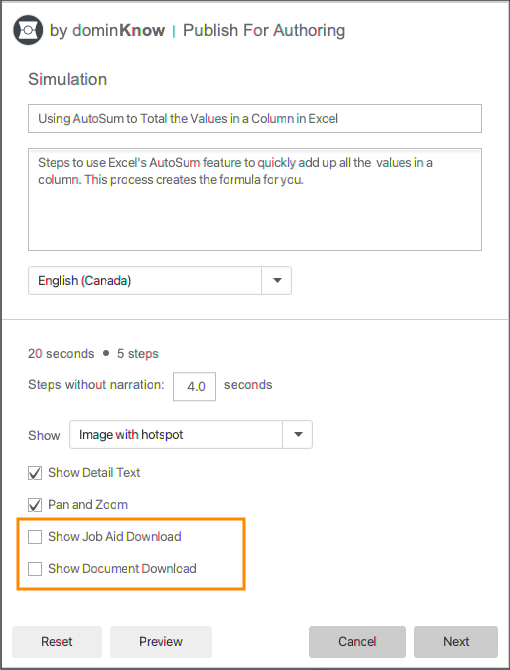
The Document option is the same as the Document publishing option as described above.
The Job Aid is a PDF file of the lesson.
It's different than publishing a Document.
The Job Aid shows the text for each step plus the screen area within the step's hotspot, rather than the whole screen image.
In the Capture settings is a tab for the Job Aid:
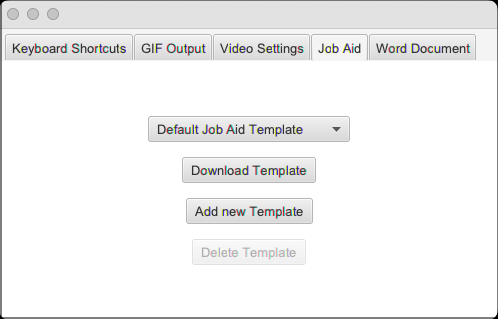
If you have more than the default Job Aid Template available, you can select a template using the drop-down menu. This choice will be set until you return to this panel to change the template choice.
The Download Template button allows you to download the default template so you can edit it in Word.
The Add new Template button allows you to add a template after editing it.
The Delete template button allows you to remove a template (you can not remove the Default.)
To access these settings on Windows, go to File > Preferences.
To access these on a Mac, go to Capture > Preferences.


Comments ( 0 )
Sign in to join the discussion.